Create a Cloud Server
This guide explains how to create a new Cloud Server within the SeFlow Global Cloud platform.
1. Access the Control Panel
Open the link: https://admin.services.seflow.cloud
2. Select the Data Center
From the top selector, choose the Data Center where you want to create your Cloud Server.
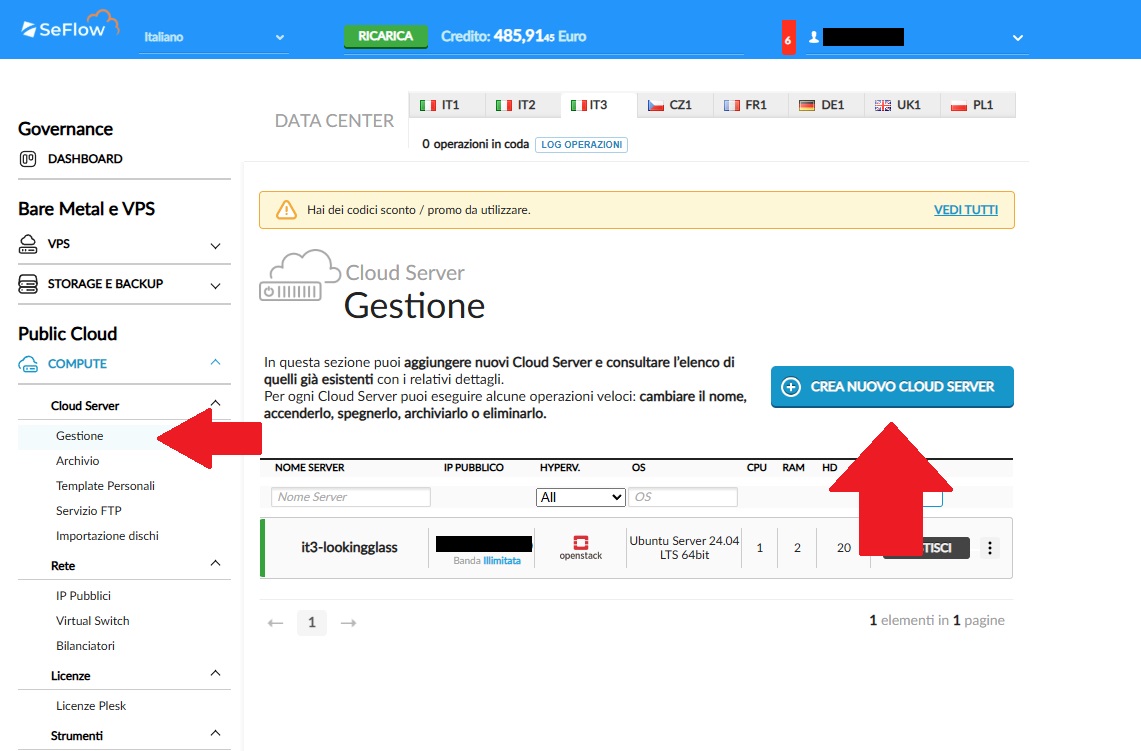
3. Navigate the menu
Public Cloud → Compute → Cloud Server → Management
4. Start the creation process
In the Cloud Server — Management section, click on CREATE NEW CLOUD SERVER.
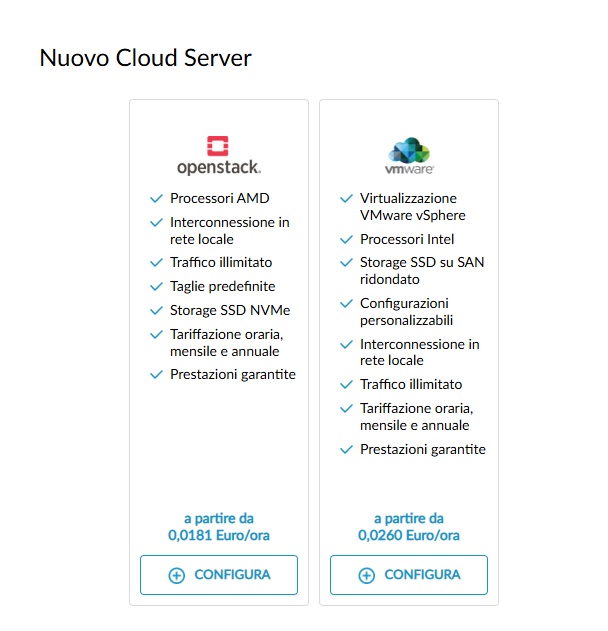
5. Select the type
The New Cloud Server window will open. Choose the platform:
- OpenStack Cloud Server
- VMware Cloud Server
Click CONFIGURE for the chosen Cloud Server type.
OpenStack Cloud Server
1. Technology selection
The OpenStack hypervisor is selected by default.
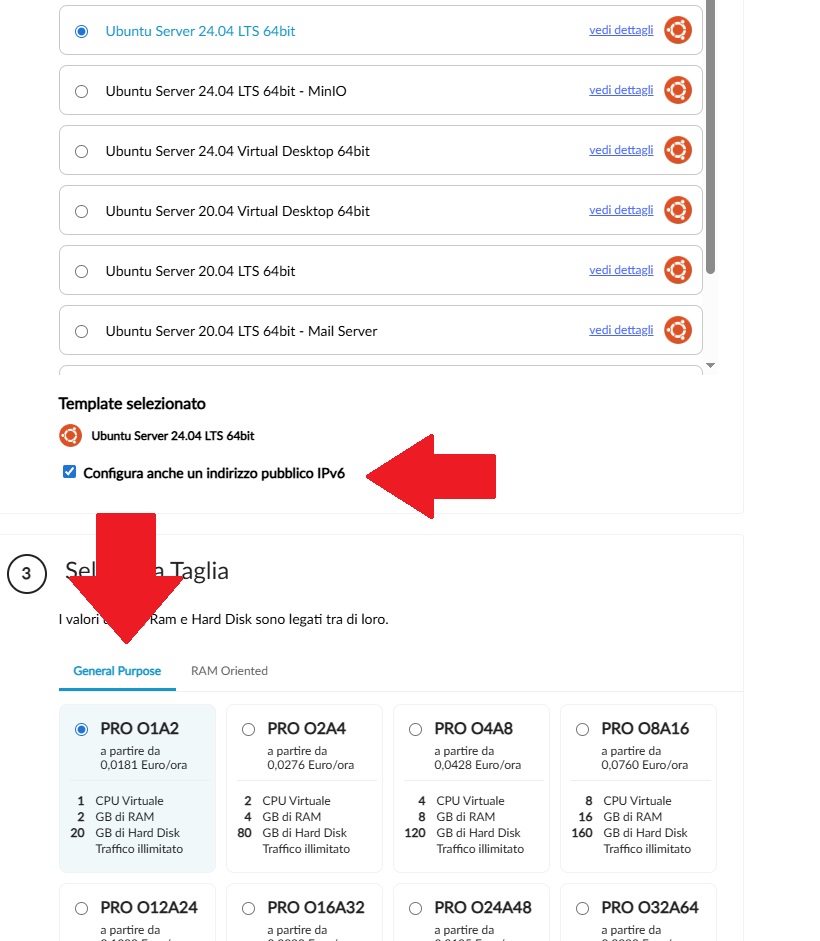
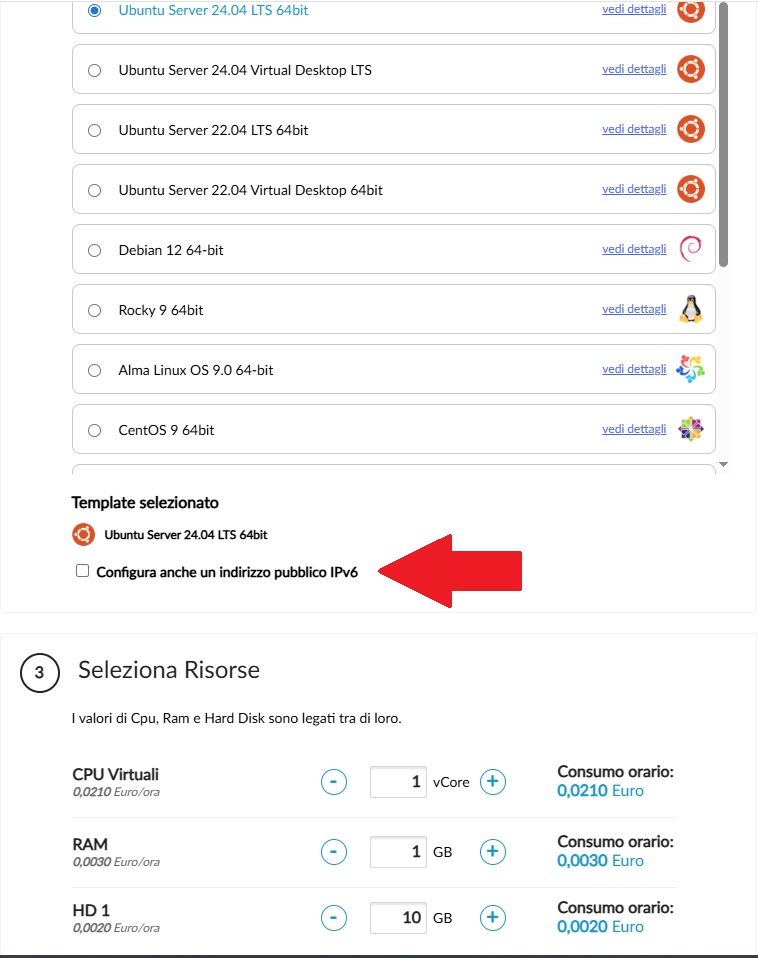
2. Template selection
- Select one of the available templates.
- By choosing Also configure a public IPv6 address (recommended), you will get both an IPv6 and an automatically assigned IPv4 address.
- The IPv6 address can only be added during the server creation phase.
3. Size selection
- General Purpose, vCPU/RAM ratio 1:2
- RAM Oriented, vCPU/RAM ratio 1:4
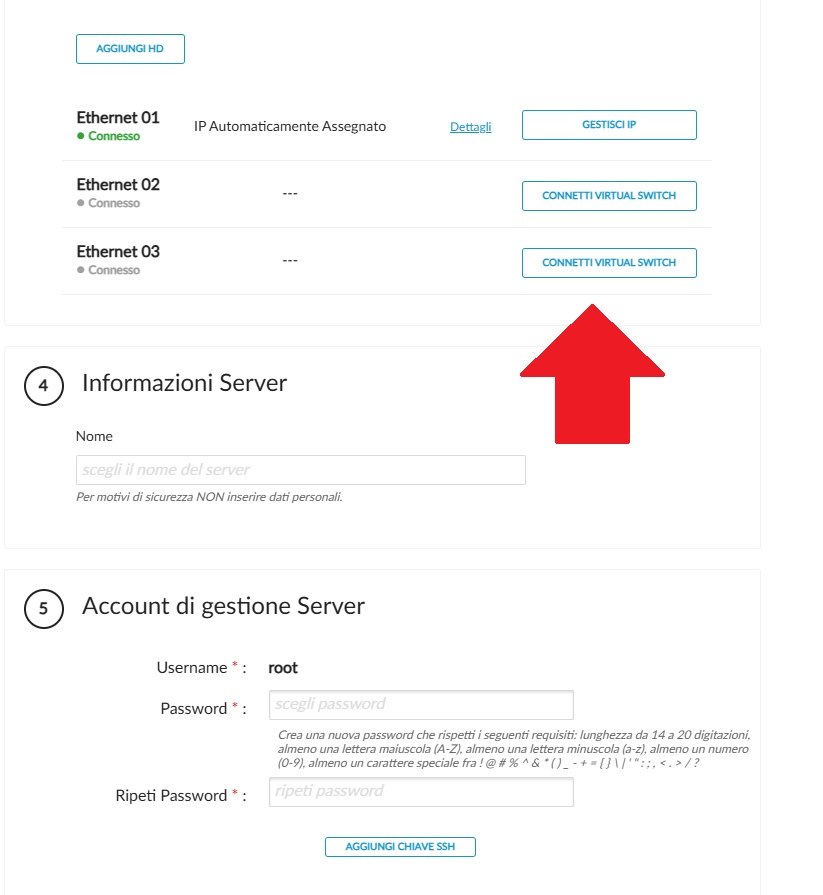
In both cases, you can:
- Add one or more disks using ADD HD.
- Manage IPv4 using MANAGE IP.
- Connect a virtual switch using CONNECT VIRTUAL SWITCH.
4. Server information
Assign a name to your Cloud Server.
5. Server management account
- Set the password for your Cloud Server.
- If you selected a Linux template, you can add an SSH key.
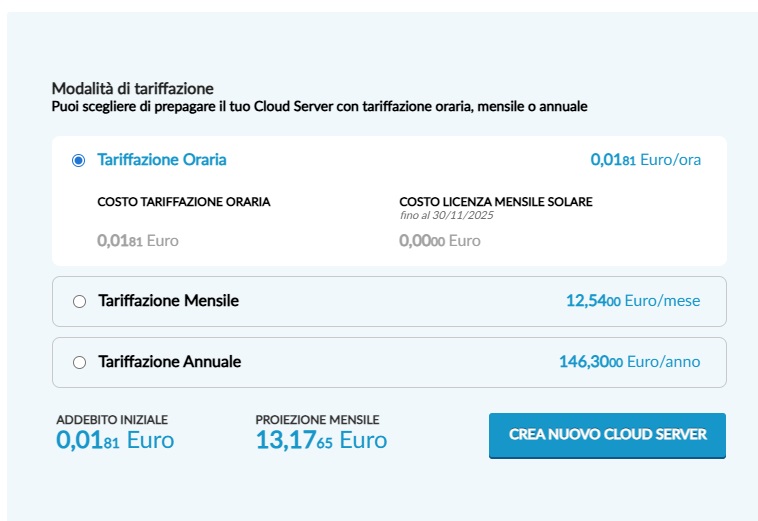
6. Billing mode
- Hourly
- Monthly (30 days)
- Annual
Click CREATE NEW CLOUD SERVER, then confirm in the Create new Cloud Server window with OK, CREATE CLOUD SERVER.
VMware Cloud Server
1. Technology selection
The VMware or Hyper-V hypervisor is selected by default.
2. Template selection
- Select one of the available templates.
- To create a Cloud Server from your own template, select ENABLE FTP IMPORT (see dedicated guide).
- By choosing Also configure a public IPv6 address (recommended), you will get both an IPv6 and an automatically assigned IPv4 address. The IPv6 address can only be added during server creation.
3. Resource selection
- Specify the number of virtual CPUs, RAM amount, and primary disk size.
- Add disks using ADD HD.
- Manage IPv4 with MANAGE IP.
- Connect a virtual switch using CONNECT VIRTUAL SWITCH.
4. Server information
Assign a name to your Cloud Server.
5. Server management account
- Set the password for your Cloud Server.
- If you selected a Linux template, you can add an SSH key.
6. Billing mode
- Hourly
- Monthly (30 days)
- Annual
Click CREATE NEW CLOUD SERVER, then confirm in the Create new Cloud Server window with OK, CREATE CLOUD SERVER.
Billing type
The selected billing type applies to vCPU, RAM, HD, and any Microsoft Windows Server license. It does not affect resources billed hourly (Virtual Switch, additional IPs) or those billed monthly (Microsoft RDS and SQL Server licenses).
Annual billing example
For a Cloud Server running Windows Server with vCPU, RAM, HD, Microsoft SQL Server license, Virtual Switch, and one additional IP:
- You will pay in advance (for the year) for vCPU, RAM, HD, and Microsoft Windows Server license.
- Virtual Switch and additional IP are billed hourly.
- The Microsoft SQL Server license is billed monthly.
The billing type can be changed at any time.


